ebb and flow
musings on finding the joy and beauty in each day
Friday, January 20, 2012
this moment
joining amanda in -
{this moment} - A Friday ritual. A single photo - no words - capturing a moment from the week. A simple, special, extraordinary moment. A moment I want to pause, savor and remember.
Thursday, January 19, 2012
light table recommendations
Ten years ago, I did some practicum work in a local Reggio Emilia inspired preschool. It was such an inspiring place to learn and later work for a few summers. One classroom had a massive handmade light table that was just spectacular. The children loved using it in so many different ways with so many different materials. I did too!
I've had a few questions about our light table and what I would recommend. Here is what we have. We've had it over a year and it is holding up great. I think it is a great option for two to three children playing simultaneously. Eleanor (14 months) has been crawling and sitting on it since she was able to scoot. We have not had to change to bulb yet and we use it daily, even for hours at a time. It usually stays put in our play room or art room, but it easily fits under my coffee table or sofa.
This light box also seems like a great option, being smaller and thinner.
This light panel is also a great option being the smallest, lightest, and least expensive of the three. I've seen it or something similar to it on ever inspiring blogs such as sewliberated.typepad.com and playathomemom3.blogspot.com. It does appear to fit one child comfortably, maybe two at most?
http://thedeliberatemom.blogspot.com/2011/09/my-homemade-light-table.html#.Txjfj2NWqJU
http://www.teachpreschool.org/2011/06/update-tweaking-my-diy-light-table/
http://tinkerlab.com/2011/08/easy-diy-light-table/
I cannot find any examples of a similar light table that I had the privilege of seeing in the Reggio Emilia inspired preschool, but if you have some basic carpentry and electrical skills, you could totally make one. Anyone feeling up to an Ikea hack challenge???
And not that I need to explain myself, but I do recognize these things are expensive! Our light box was a gift from very generous grandparents, but we would have been comfortable purchasing this item for the following reasons. We do not buy our girls a lot of clothes. We get fabulous hand me downs and generous gifts. We do not purchase a ton of toys for the girls. We buyer fewer, open-ended toys. As I stay at home, we are not spending money on childcare or preschool. With that in mind, I do want to provide the girls with rich experiences that will give them opportunities to learn while playing. Is the light table/box a necessary item to ensure proper development of your child? Of course not, but it is oh so much fun!
Stay tuned for a post on some of the many materials you can use with the light table.
Tuesday, January 17, 2012
water color painting with the light table
Painting on the light table is one of our favorite ways to use the light table. It adds a little extra fun to water color painting.
I have used these water colors for over five years. I love them so much, I have never tried anything else. The colors turn out amazing and you treat it like a concentrate, so it lasts forever. Love.
We saved our egg dying cups from Easter and use them to hold our different colors. One brush for every color. I also like using the clementine crate to hold the cups, which makes it less likely to spill.
Oohing and Aahing over the way the color lights up.
As always, Eleanor joined the party. Quite excited.
So excited that she will need two brushes, please and thank you.
And give it a little taste for good measure.
Her bum says it all.

Now if only the light table produced a little Vitamin D...
Friday, January 13, 2012
this moment
joining amanda in -
{this moment} - A Friday ritual. A single photo - no words - capturing a moment from the week. A simple, special, extraordinary moment. A moment I want to pause, savor and remember.
Thursday, January 12, 2012
light table + sensory bin = our new favorite materials
I have been in a serious play rut as of late. I find us in a pretty tricky time with a 3.5 year old and a 1 year old. Abby (3.5) wants to do involved art projects and/or build intricate buildings with blocks while using her imaginative play skills to create little worlds of fairies and dragons and everything in between. Enter Eleanor (1) who needs to climb and dump. And destroy anything Abby tries to create.
Instead of always telling one of the girls we can't do this now... but we will get to it, I am trying to think of things they both will enjoy simultaneously.
We typically use the light table to build with magna-tile blocks (they are worth every penny), but I was so inspired by the mamas at playathomemom3.blogspot.com, that I decided it was time to make a sensory bin that we use with the light table. Although the picture below looks like Valentine's Day exploded in our playroom, it is just what we needed.
Wal-Mart came through strong with the contents of this sensory bin. It includes: jewels and gems found in the floral section, flower mirrors, fairy wands, beaded bracelets, and a variety of glass jars for dumping and pouring.
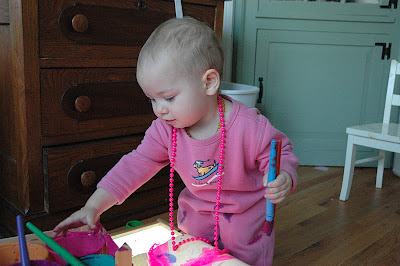
Eleanor LOVED dumping and pouring.
She would pick certain jewels for me.
She also liked trying on the bracelets.
Abby went crazy over this idea. She was oh so happy. While Eleanor dumped and poured with me, Abby immediately began to sort ruby reds from the hearts and flowers. She did this independently without me even suggesting it.
And then the imaginative play started in an instant. The fairy wands + ruby red jewels + rainbow bracelets were the only thing that could protect us from the dragons in the art room. They were trying desperately to get our treasure.
Since Abby was wearing the rainbow bracelet, she was a super fairy so she could protect us all. Baby Eleanor dragon included, as long as she did not take (too) much treasure.
The treasure was only safe in the fairy fort where the vigilant super fairy stood guard.
Until she needed a snack and then Baby Eleanor Dragon swooped in for the kill.
This was the most fun we have all had together in a very long time. Each girl could do what they love using the same materials.
I love it when a plan comes together.
Monday, January 9, 2012
fairy fort playstand
I am pretty excited about my the girls' Christmas present. Prior to Christmas, Abby was very busy making forts of all kinds. Her uncle who is very calculated and meticulous when it comes to fort making showed her the ropes.
With Abby's affinity for fort making in mind, we decided this playstand could provide a lot of pretend play opportunities... and it is just so beautiful. I love being in the playroom even more.
She calls it her fairy fort.
Christmas lights definitely add to the charm of this fairy fort, don't you think?
I'm looking forward to posting more about the fun had in this fairy fort, wedding canopy, and whatever else we come up with!
Friday, January 6, 2012
Subscribe to:
Comments (Atom)


